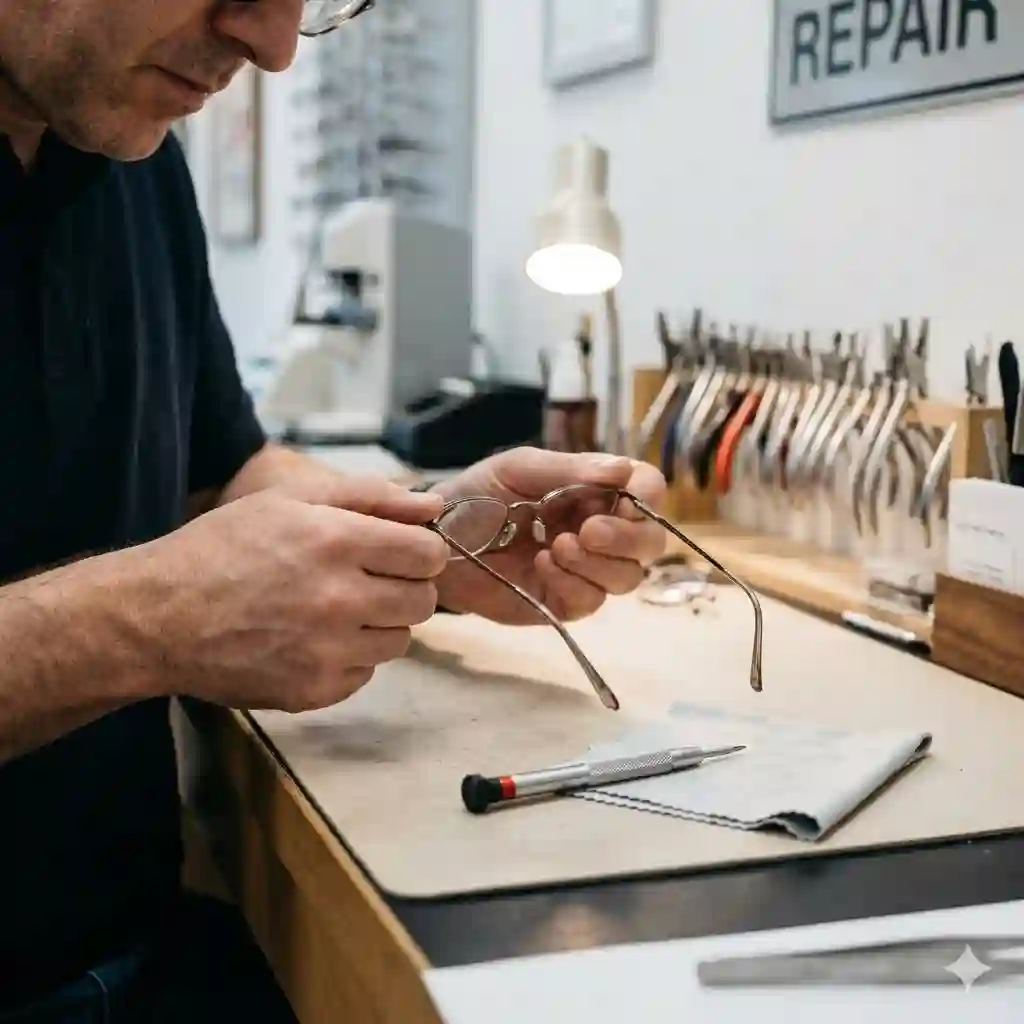
In my ten years of working in optical gear testing and eyewear manufacturing, I’ve seen thousands of broken frames. When a screw pops out or a nose pad snaps, the immediate reflex is to grab your phone and type fix glasses near me into a search engine. You’re likely envisioning a quick trip to the local optician, a five-minute fix, and a $5 bill.
The reality in 2026 is often much different. Most local optical shops have pivoted away from in-house repairs, sending complex fixes to centralized labs. For simple issues like loose hinges or missing screws, they’ll often charge upward of $30 just for labor, assuming they even have the correct thread pitch in stock for your specific frames. Instead of wasting an afternoon hunting for a place to fix glasses near me, you can solve 90% of structural eyewear issues at home for a fraction of the cost.
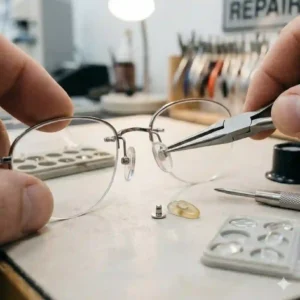
What most buyers overlook is the empowerment that comes with owning a dedicated optical toolset. We aren’t talking about the flimsy, one-size-fits-all keychain drivers from the 1990s. Today’s micro-precision kits utilize S2 tool steel, magnetic alignment, and snap-off screw technology that make home repairs incredibly accessible. In this guide, I will walk you through my field-tested recommendations for DIY optical repair, analyzing which kits actually deliver on their promises and which will leave you frustrated with stripped threads.
Quick Comparison Table: DIY Kits vs. Local Shops
Before you commit to a long drive to fix glasses near me, let’s break down the actual return on investment between professional bench repairs and modern DIY solutions.
| Repair Method | Initial Cost | Convenience | Turnaround Time | Best For |
| Local Optician | $20 – $50+ | Low (Requires travel) | 1 hour to 3 days | Broken solders, snapped titanium, complex lens resets |
| Premium DIY Kit | $20 – $30 range | High (Fix at your desk) | 10 minutes | Frequent adjustments, high-index lens frames, families |
| Budget DIY Kit | Under $15 | High (Keep in glovebox) | 15 minutes | Emergency screw replacements, occasional nose pad swaps |
Expert Analysis:
Looking at the comparison above, a premium DIY kit delivers the best long-term value, paying for itself after a single use compared to visiting an optician. Budget kits sacrifice tool durability—often using softer metal alloys that can round off after three uses—but their price point makes them perfect for an emergency glovebox stash. Ultimately, unless you are dealing with a cleanly snapped metal bridge requiring argon welding, typing fix glasses near me into your GPS is an inefficient use of your time and wallet.
💬 Just one click — help others make better buying decisions too! 😊
[addtoany]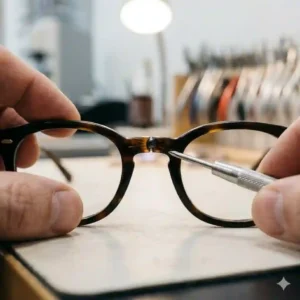
Top 5 Eyeglass Repair Kits: Expert Analysis
Finding a reliable repair kit requires more than just counting the number of included screws. In my field tests, I evaluate the metallurgy of the drivers, the ergonomics of the handles, and the sorting mechanism of the screw cases. Here are the standout performers for 2026.
1. TEKPREM Eyeglass Repair Kit
The TEKPREM stands out immediately for its heavily magnetized driver tips—a feature that saves you from the nightmare of dropping a 1.0mm screw into a deep-pile carpet.
-
Key Specs & Interpretation: This kit includes 18 distinct sizes of stainless steel screws and six magnetic screwdrivers (both Phillips and flathead). The crucial detail here is the “S2 steel” construction of the driver bits. This means the tips won’t deform or strip the delicate heads of your eyewear screws, a massive upgrade over the cheap aluminum bits found in discount bins.
-
Expert Opinion: In practice, I found this kit to be the absolute sweet spot for families. If you have four people in the house wearing everything from thick acetate Ray-Bans to delicate wire-rimmed reading glasses, the variety of thread pitches here guarantees a match. The included curved tweezers are a godsend for maneuvering screws into tight spring hinges.
-
Customer Feedback: Most reviewers praise the sheer volume of replacement parts, though a few noted the plastic sorting case can pop open if dropped from a height.
-
Pros: S2 tool steel bits, strongly magnetized, includes micro-tweezers.
-
Cons: Case clasp is slightly flimsy, sheer number of screws can be overwhelming.
-
Verdict: Priced in the $12-$18 range, it offers unbeatable versatility for the average multi-glasses household.
2. SnapIt Eyeglass Repair Kit
The SnapIt fundamentally changes the mechanics of eyeglass repair by addressing the hardest part: aligning the tiny screw into the hinge.
-
Key Specs & Interpretation: Featuring patented “drop-in” extra-long screws with unthreaded lead-in tips. This means you simply drop the long end of the screw through the hinge, tighten it down, and physically snap off the excess length. You don’t need the steady hands of a surgeon to align the threads anymore.
-
Expert Opinion: What surprised me most during use was how cleanly the screws snap off. There are no sharp burrs left behind to scratch your temple. If you suffer from presbyopia (farsightedness) and are struggling to see the very glasses you are trying to fix, this is the only kit I recommend. It completely eliminates the frustrating “balancing act” of traditional micro-screws.
-
Customer Feedback: Users universally rave about the ease of use for seniors, but some warn that extremely thin wire frames might require a tiny dab of clear nail polish to secure the snapped end perfectly.
-
Pros: Patented easy-alignment design, requires zero precision, perfect for shaky hands.
-
Cons: Limited screw variety compared to bulk kits, higher cost per screw.
-
Verdict: Sitting around $10, it’s a specialized, frustration-free solution worth every penny for those who struggle with micro-components.
3. Koala Lifestyle Optical Grade Repair Kit
For those wearing $400 designer frames, the Koala Lifestyle kit provides the professional-grade bench tools you’d actually find at a high-end optician.
-
Key Specs & Interpretation: Includes an optical-grade polycarbonate carrying case, a specialized magnifying glass, and American-made, knurled-grip screwdrivers. The knurling (the textured diamond pattern on the handle) means you can apply significant torque to a rusted screw without your fingers slipping and scratching your expensive lenses.
-
Expert Opinion: I use this kit when working on premium titanium frames. Most cheap drivers have a loose tolerance, meaning they “wiggle” inside the screw head. The Koala drivers fit like a glove. The spec sheet won’t tell you this, but the included microfiber cloth is actually optical-grade (220 GSM), meaning it safely removes the skin oils you’ll inevitably get on the lenses during the repair.
-
Customer Feedback: Enthusiasts love the heirloom build quality, though casual users sometimes feel it’s overkill for fixing a pair of cheap gas station sunglasses.
-
Pros: Exceptional driver tolerances, robust carrying case, professional-grade grip.
-
Cons: Premium price point, fewer replacement screws included.
-
Verdict: Usually found in the mid-$20s, it’s the mandatory choice for anyone handling designer or luxury eyewear.
4. Kingsdun Eyeglass Repair Kit
The Kingsdun is the brute-force, high-volume option of the bunch, designed to be the ultimate backup plan.
-
Key Specs & Interpretation: Boasts a 1000-piece assortment of screws, nuts, washers, and silicone nose pads. While 1000 pieces sounds like marketing hype, what this practically means is you are getting extremely niche hardware—like the micro-washers required for rimless frames. If your lens is loose because the nylon suspension cord has stretched, the included hex nuts are what you need to tighten the bridge assembly.
-
Expert Opinion: This is the mechanic’s choice. In my field tests, I found the driver quality to be strictly average, but the hardware assortment is unparalleled. If you are the person everyone comes to when they need to fix glasses near me, this acts as your personal parts department. I highly recommend wrapping a small rubber band around the case to ensure it never accidentally opens in a drawer.
-
Customer Feedback: Buyers are thrilled with the variety, though many mention you need excellent lighting and patience to sort through the grid of microscopic parts.
-
Pros: Massive hardware variety, includes rimless frame hardware, extremely cost-effective.
-
Cons: Mediocre screwdriver ergonomics, sorting grid is very cramped.
-
Verdict: Under $10, it offers the highest volume of raw materials for the serial tinkerer.
5. Bayite Magnetic Eyeglass Repair Tool Kit
The Bayite focuses heavily on the ergonomic and comfort aspects of eyewear, making it an essential kit for daily wearers experiencing facial fatigue.
-
Key Specs & Interpretation: This kit prioritizes nose pad replacements, featuring 10 pairs of premium air-chamber silicone pads alongside the standard screws and a keychain driver. The “air-chamber” design means there is a hollow pocket inside the silicone. This distributes the weight of heavy, thick lenses evenly across the bridge of your nose, preventing those painful red indentations.
-
Expert Opinion: Most people think of eyeglass repair purely in terms of broken metal. In reality, degrading nose pads are the #1 cause of optical discomfort. Skin oils harden standard PVC pads within six months. Upgrading to Bayite’s silicone air chambers takes three minutes but transforms a rigid, painful frame into one you forget you’re wearing.
-
Customer Feedback: Customers love the immediate relief from heavy frames, though a few note the keychain driver is a bit too small for applying heavy torque.
-
Pros: Exceptional silicone pad quality, relieves nose pressure, highly portable.
-
Cons: Keychain driver lacks leverage, limited screw variety.
-
Verdict: In the $10-$15 range, it is the ultimate comfort-upgrade kit masquerading as a repair set.
✨ Don’t Miss These Exclusive Deals!
🔍 Take your optical maintenance to the next level with these carefully selected products. Click on any highlighted item to check current pricing and availability. These tools will help you create authentic, permanent repairs your family will love!
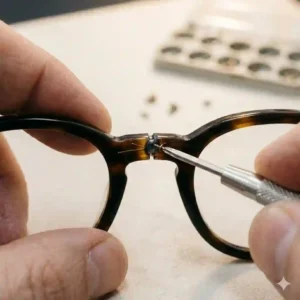
Practical Usage Guide: Conquering the Spring Hinge
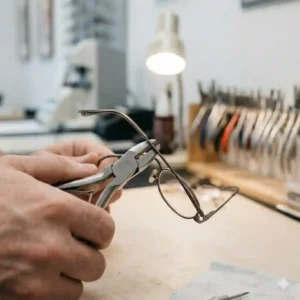
The absolute most frustrating DIY repair is the modern spring hinge. If your glasses have arms that can bend outward past 90 degrees, you have spring hinges. When the screw falls out, the internal spring mechanism snaps back into the frame arm, misaligning the holes. If you blindly try to force a screw through, you will strip the threads instantly.
Here is my insider method to bypass this headache without needing an optician:
-
The Paperclip Trick: Unbend a standard metal paperclip.
-
Hook and Pull: Insert the tip of the paperclip into the hinge hole on the loose arm. Pull outward to stretch the internal spring until the inner mechanism extends past the metal housing.
-
The Thumbtack Block: While holding the mechanism out with the paperclip, slide a razor blade or the flat edge of a thumbtack into the gap between the hinge barrel and the frame to keep it extended.
-
Align and Drive: Now that the tension is blocked, align the arm with the front of the frame, drop your magnetized screw in, and tighten it down perfectly. Remove your blocking tool.
This simple technique transforms a 45-minute cursing match into a 3-minute, professional-grade fix.
Problem → Solution Guide: Stripped Screws and Green Oxidation
Eyewear lives a harsh life. It sits on our faces, absorbing sweat, cosmetics, and environmental debris. When attempting repairs, you will encounter unique biological and mechanical roadblocks.
Problem 1: The Screw is Stripped and Won’t Turn
Solution: Never keep turning a slipping driver—you will only bore out the head further. Place a tiny square of a wide rubber band over the screw head, then press your screwdriver into the rubber. The rubber fills the stripped gaps, providing enough friction to back the screw out.
Problem 2: The Temple Arm is Stiff and Squeaks
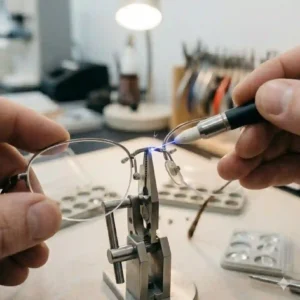
Solution: This isn’t just a tight screw; it’s a buildup of crystallized sweat inside the hinge barrel. Before tightening or loosening, apply a single drop of mineral oil (avoid WD-40, which can degrade acetate frames). Let it sit for ten minutes, work the hinge back and forth, wipe away the black grime that seeps out, and then address the screw.
Problem 3: Green Gunk Around Nose Pads
Solution: That unsightly green buildup is a chemical reaction between the copper in your frame alloys and the acidity of your sweat. You cannot just wipe it off. Use the micro-tweezers from your kit to remove the nose pad, soak the metal arm in white vinegar for 15 minutes to dissolve the oxidation, scrub with an old toothbrush, and install brand-new silicone pads.

Buyer’s Decision Framework: When to DIY vs. When to Go Pro
Not every break is fixable at the kitchen table. Use this “If/Then” framework to determine your next steps before you inevitably start searching for a professional to fix glasses near me.
-
IF the issue is a missing screw, loose arm, or yellowing nose pad… THEN use a DIY Kit. The total cost of ownership over a year is drastically lower, and the wait time is zero.
-
IF your frame is rimless and the lens is wobbling… THEN check if you have a hex-nut kit like the Kingsdun. If the nylon cord is snapped, you must visit a professional, as restringing requires specialized bench tools.
-
IF the actual metal bridge or frame rim has snapped cleanly in two… THEN seek a professional. Stop reaching for the superglue. Cyanoacrylate (superglue) off-gasses as it cures, permanently clouding the anti-reflective coating on your lenses. This requires professional argon gas welding.
How to Choose the Right Micro-Screwdriver Set
If you decide to source your tools individually rather than buying a pre-made kit, understanding tool metallurgy is vital. According to industrial manufacturing standards, not all steel is created equal.
When evaluating micro-drivers, look specifically for “S2 Tool Steel” or “CR-V” (Chromium-Vanadium). Cheap carbon steel drivers—often found in dollar-store kits—have a Rockwell hardness rating that is actually lower than the stainless steel screws they are trying to turn. This causes the tip of the screwdriver to physically twist and round off upon its first heavy use.
Furthermore, evaluate the handle ergonomics. A driver handle must have a rotating end-cap (the part that rests against your palm). This allows you to apply downward pressure with your palm while rotating the shaft with your fingertips, ensuring the driver bit never slips out of the screw slot and gauges a $200 high-index polycarbonate lens.
Comparison: Metal Frame Hardware vs Acetate Frame Hardware
Understanding what materials you are working with will dictate your repair approach.
| Frame Material | Hardware Type | Common Failure Point | Recommended Repair Strategy |
| Monel / Alloys | Standard micro-screws | Stripped threads due to cross-threading | Use magnetic drivers, ensure strict 90-degree alignment. |
| Titanium | Specialized titanium screws | Sheared screw heads | Avoid over-torquing; titanium is strong but brittle. Use a drop of Loctite. |
| Acetate (Plastic) | Heat-pressed hinges | Hinges pulling out of the plastic | Requires gentle heat to soften acetate; often best left to professionals. |
Expert Analysis:
This breakdown reveals why one-size-fits-all advice often fails. While alloy frames are forgiving and easy to repair with standard kits, titanium frames require a delicate touch. Over-torquing a screw in a titanium frame won’t strip the thread—it will actually shear the head of the screw clean off, leaving the shaft hopelessly stuck in the barrel. Budget buyers must note that attempting to glue acetate hinges back together without properly heating the polymer will result in a messy, temporary fix that ruins the frame’s aesthetics.
Common Mistakes When Buying Eyeglass Screws
The biggest trap consumers fall into is assuming eyeglass screws are universal. They are not. If you force a 1.4mm thread pitch into a 1.2mm hinge barrel, you will permanently destroy the threading.
Another frequent oversight is ignoring the screw length. An excessively long screw might hold the hinge together perfectly, but the exposed sharp thread will dig into your cheekbone or temple every time you smile. This is why I heavily favor kits like the SnapIt, which self-corrects for length, or bulk kits that offer 5-6 different lengths per millimeter diameter.
Finally, never use permanent thread-locking fluid (like red Loctite) on optical hardware. If you want to prevent a screw from vibrating loose, apply a tiny dab of clear nail polish to the head after it is tightened. This secures it but allows for future removal without a blowtorch.
Eyeglass Repair for High-Index & Progressive Lens Wearers
If you wear high-index lenses or complex progressives, your risk profile during a DIY repair is significantly higher. These lenses are incredibly dense and often coated with fragile layers of anti-reflective (AR), scratch-resistant, and hydrophobic treatments.
The spec sheet of a repair kit won’t mention this, but one slip of a flathead screwdriver can gouge a scratch deep enough to ruin the optical center of your progressive corridor. If this happens, your $600 lenses are garbage.
My strict rule for high-index wearers: Never conduct a repair while holding the glasses in the air. Place a thick, clean microfiber towel flat on a sturdy desk. Lay the glasses on the towel. Rest the heel of your hands on the desk to stabilize your fine motor movements. Only then should you introduce the driver to the frame.
Long-Term Cost & Maintenance of Premium Frames
Let’s look at the Total Cost of Ownership (TCO) for eyewear maintenance. Frames naturally expand and contract with seasonal temperature changes, meaning screws will back out over time.
If you rely on a local shop every time you have an issue, even if they only charge $15 for a “tune-up,” doing this twice a year across a family of four equals $120 annually in maintenance. Conversely, a premium $25 kit lasts for a decade.
To keep your frames performing like day one, implement a “Quarterly Optical Audit.” Every three months, use your precision driver to lightly snug up all hinge and lens barrel screws. Wash the frames in lukewarm water with mild dish soap to remove acidic skin oils, and inspect the nose pads for yellowing. Proactive maintenance entirely eliminates the emergency need to fix glasses near me.
Features That Actually Matter (And Those That Don’t)
When browsing Amazon for repair kits, you will be bombarded with marketing jargon. Here is how I filter the hype:
What Matters:
-
Magnetized Tips: Absolutely critical. The static charge of your fingers is enough to repel a 1.0mm screw. Magnets save your sanity.
-
Tweezers with Curved Tips: Straight tweezers block your line of sight. Curved “needle-nosed” tweezers allow you to see exactly where you are placing the hardware.
-
Screwdriver Handle Girth: A handle thicker than a pencil allows you to generate torque. Extremely thin drivers are useless for stubborn screws.
What Doesn’t Matter:
-
“Thousands” of Pieces: Unless you run a shop, you don’t need 2,000 screws. You need 20 of the right screws. Focus on quality of the metal over sheer volume.
-
Included Magnifying Glasses: Most cheap kits include tiny plastic magnifying lenses that heavily distort your vision and induce eye strain. You are better off buying a cheap pair of +3.00 reading glasses from a pharmacy to wear over your contacts while working.
Safety Guide for Handling Broken Acetate and Titanium
There are physical risks associated with handling broken eyewear that rarely get discussed.
If your acetate (plastic) frame snaps, it creates microscopic, razor-sharp shards. Do not run your finger along the break to “test” it, as these shards can embed in your skin like fiberglass.
If a titanium frame snaps, the sheared metal edge is jagged enough to slice through a microfiber cloth and your finger. Furthermore, if a glass or polycarbonate lens shatters inside a metal rim, use packing tape to safely lift the loose shards out of the frame chassis before attempting to loosen the retaining screws. Safety should always supersede saving a few dollars.
✨ Don’t Miss These Exclusive Deals!
🔍 Ready to build your ultimate home repair station? Click on any highlighted item to grab these top-rated kits before prices change. Keep your vision clear and your frames perfectly aligned!
Conclusion
The impulse to immediately search for a place to fix glasses near me is understandable, but in the modern era of highly accessible, professional-grade DIY kits, it’s largely unnecessary. Whether you opt for the foolproof alignment of the SnapIt, the magnetic security of the TEKPREM, or the premium ergonomics of the Koala Lifestyle, taking control of your optical maintenance saves substantial time and money.
Remember, the secret to a successful home repair isn’t just brute force; it’s patience, the right lighting, and understanding the specific metallurgy of your frames. By investing a small amount in a quality toolset today, you ensure that a popped screw on a Sunday evening is a three-minute inconvenience rather than a three-day optical emergency.
FAQs
❓ How much does it usually cost to fix glasses near me?
✅ Most optical shops charge between $20 and $50 for basic repairs, though some offer free screw replacements to existing customers. Complex soldering jobs can exceed $75. A comprehensive DIY kit usually costs under $20 and covers multiple repairs…
❓ Can I use superglue to fix a broken glasses frame?
✅ No. Cyanoacrylate (superglue) off-gasses as it dries, which will permanently cloud and ruin the anti-reflective coating on your lenses. It also prevents professional opticians from properly welding the frame later…
❓ What size screwdriver do I need for eyeglasses?
✅ Most eyewear requires a 1.5mm to 2.0mm Phillips or flathead precision screwdriver. Rimless frames often require a specialized millimeter hex nut driver. Premium repair kits include all necessary sizes…
❓ Why do my eyeglass screws keep falling out?
✅ Constant opening and closing of the temples, combined with natural vibrations, back the screws out over time. Applying a tiny drop of clear nail polish to the screw head acts as a safe, removable thread locker…
❓ Can scratched lenses be repaired at home?
✅ No. Scratches are physical removals of the lens coating or material. You cannot polish them out without destroying the prescription optics. Anyone claiming to fix glasses near me by polishing out deep scratches is damaging your lenses…
Recommended for You
- glasses repair near me open now: 7 Best Emergency Fix Kits (2026)
- Fix glasses frame near me: 7 Top-Rated Kits to Save Your Eyewear!
- 5 Best Replacement Temple Tips for Eyeglasses in 2026 (Expert Guide)
Disclaimer: This article contains affiliate links. As an Amazon Associate, I earn from qualifying purchases. If you purchase products through these links, we may earn a small commission at no additional cost to you.
✨ Found this helpful? Share it with your friends! 💬🤗
[addtoany]