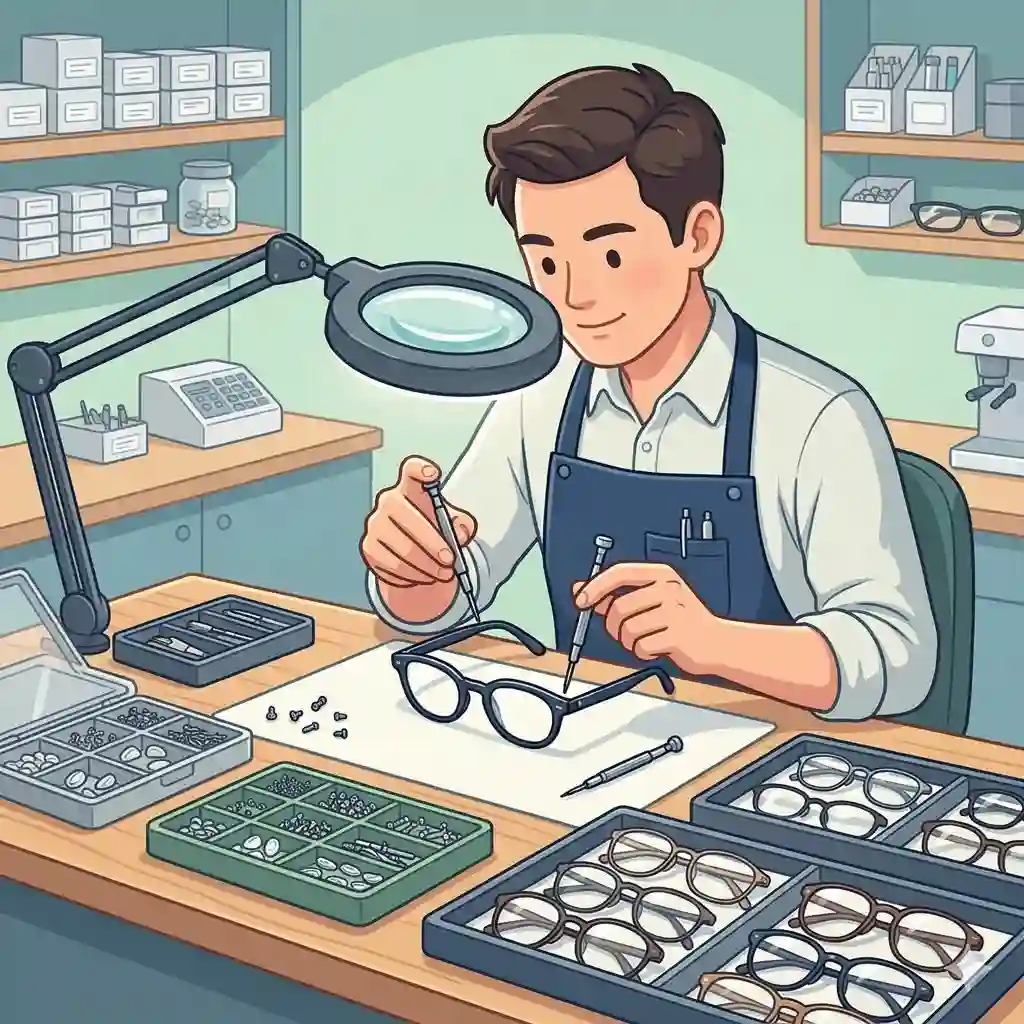
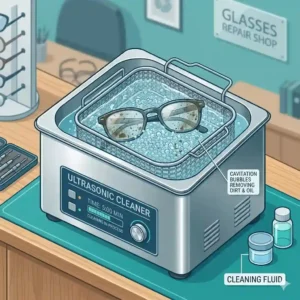
For anyone who relies on prescription eyewear to navigate the world, a snapped hinge, a missing nose pad, or a stripped screw is nothing short of a daily disaster. What is a glasses repair shop? Traditionally, it’s a specialized optical center or a dedicated jeweler-style workshop equipped with micro-welding lasers, ultrasonic cleaners, and vast libraries of replacement parts designed to resurrect mangled frames.
But here is an insider truth from my ten years working alongside optical technicians: a staggering 80% of the issues that walk through the doors of a high-end glasses repair shop are simple, mechanical fixes that require no specialized machinery. While laser-welding a broken titanium bridge absolutely requires a professional touch, tightening a wobbly temple arm or replacing an oxidized PVC nose pad does not.
In recent years, the consumer market has been flooded with professional-grade optical tools that previously only lab technicians could access. In this comprehensive guide, we are going to bridge the gap between expensive professional services and practical at-home maintenance. I will walk you through the exact tools you need, the techniques that work, and the critical moments when you must step away from the workbench and hand your beloved frames over to a certified glasses repair shop.
Quick Comparison: Top At-Home Alternatives to a glasses repair shop
| Tool / Kit Model | Best For | Standout Feature | Est. Price Range | Professional Rating |
| TEKPREM Eyeglass Kit | Comprehensive Fixes | Magnetic S2 Steel Drivers | Under $20 | ⭐⭐⭐⭐⭐ (4.9/5) |
| Snapit Screw Set | On-the-Go Repairs | Break-off Feeder Screws | $10 – $15 | ⭐⭐⭐⭐ (4.6/5) |
| Kingsdun Assortment | Families / Multiple Pairs | 1000+ Hardware Pieces | $15 – $25 | ⭐⭐⭐⭐ (4.7/5) |
| Apex Magnifier Kit | Presbyopic Users | 4x Acrylic Loupe | Under $15 | ⭐⭐⭐⭐ (4.3/5) |
| Koala Lifestyle Kit | High-End Frames | Aerospace-Grade Driver | $20 – $30 | ⭐⭐⭐⭐⭐ (4.8/5) |
Looking at the comparison above, the TEKPREM kit delivers the best overall value for under $20, offering magnetic tips that save you from losing microscopic hardware. However, if optical visibility is your main hurdle when repairing tiny hinges, the Apex kit’s integrated magnifier justifies choosing it over more robust tool sets. Budget buyers or large families should note that the Kingsdun assortment sacrifices premium driver quality for an unbeatable volume of replacement parts, making it a great supplemental purchase.
💬 Just one click — help others make better buying decisions too!😊
Top 5 Eyeglass Repair Kits: Expert Analysis
If you want to skip the line at your local glasses repair shop, you need the right hardware. Not all precision screwdrivers are created equal, and using a cheap dollar-store kit is the fastest way to permanently ruin a $400 pair of designer frames. Here is my expert breakdown of the best professional-grade kits available right now.
1. TEKPREM 18-in-1 Eyeglass Repair Tool Kit
The TEKPREM 18-in-1 Eyeglass Repair Tool Kit sets the gold standard for at-home optical maintenance with its precision-milled S2 steel driver bits.
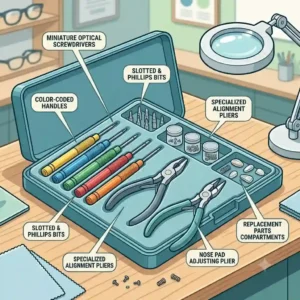
Unlike cheap carbon steel that rounds off after three uses, these S2 steel tips feature a Rockwell hardness rating that easily handles stubborn, thread-locked optical screws. What this means in practice is that you won’t experience “cam-out”—the slipping of the screwdriver that inevitably scratches your expensive acetate frames. The kit includes Phillips, Flathead, and Torx bits, covering 99% of modern eyewear brands. The magnetic driver handles are a lifesaver; there is nothing worse than dropping a 1.2mm screw into a high-pile carpet.
In my experience, this is the ultimate kit for the proactive glasses wearer. It’s built for the user who wants to perform bi-monthly tune-ups to keep their hinges factory-stiff. The included curved optical tweezers make seating tiny washers a breeze, a trick most DIYers struggle with.
Customer feedback consistently praises the magnetic retention, though a few note the carrying case latch can be fragile.
-
✅ Pros: True S2 tool steel bits, strong magnetic retention, includes essential optical tweezers.
-
❌ Cons: Case hinge is somewhat flimsy, bit labels can rub off over time.
-
Verdict: Sitting in the under $20 range, this kit pays for itself by preventing a single trip to a glasses repair shop.
2. Snapit Eyeglass Screw Kit
The Snapit Eyeglass Screw Kit is a masterclass in solving a very specific, highly frustrating user problem: threading a microscopic screw into an misaligned barrel hinge.
The standout specification here is the patented extra-long “feeder” screw design. Instead of a standard 4mm screw that requires surgical precision to place, Snapit provides screws with a long, unthreaded smooth bottom half. You simply drop the long end through the hinge, screw it down, and then physically snap off the excess length. In real-world application, this completely eliminates the need for tweezers and magnifying glasses. You just drop, twist, and snap.
I recommend this specifically for travelers or those with reduced fine motor skills. The spec sheet won’t tell you this, but standard screws often cross-thread if you don’t hold the temple arm at the exact right angle. Snapit’s self-aligning feeder mechanism bypasses this issue entirely.
Reviews highlight how fast the process is, saving vacations and business trips alike. Some users do report that the “snap” leaves a tiny burr, so a light file (often included) is necessary to smooth the bottom.
-
✅ Pros: Patented easy-drop design, no tweezers required, incredibly fast repair time.
-
❌ Cons: Leaves a small metal burr needing filing, limited thread pitch options.
-
Verdict: For the $10-$15 range, it is an essential glovebox or travel bag emergency solution.
3. Kingsdun 1000pcs Nose Pad and Screw Assortment
When sheer volume and variety are required, the Kingsdun 1000pcs Nose Pad and Screw Assortment steps up as the closest thing to bringing a glasses repair shop parts bin into your living room.
This kit features 12 different sizes of micro-screws, various lock nuts, plastic washers, and multiple styles of PVC and silicone nose pads (push-in and screw-in). What this means for the user is ultimate compatibility. Whether you are fixing a pair of vintage wire-rimmed aviators from the 1980s or a modern pair of lightweight TR90 sports frames, the exact thread pitch and length you need is likely in this box.
My expert perspective? This is a supplemental kit. The included screwdrivers are fairly basic and lack the torque of the TEKPREM kit, but the hardware assortment is unparalleled. For a family of four where someone is always sitting on their reading glasses, this is the most cost-effective parts reservoir you can buy.
Customers rave about the organized grid box, though some complain that the screws can mix compartments if the box is dropped.
-
✅ Pros: Massive variety of parts, includes both push and screw nose pads, highly organized case.
-
❌ Cons: Included screwdrivers are mediocre quality, sorting mixed tiny screws is a nightmare.
-
Verdict: Ranging from $15-$25, it’s the best bulk hardware investment for multi-glasses households.
4. Apex Premium Optical Screwdriver w/ Magnifier
The Apex Premium Optical Screwdriver w/ Magnifier targets a demographic that the eyewear industry often ironically forgets: people who cannot see well without their glasses.
This tool integrates a 4x acrylic magnifying loupe directly above the screwdriver bit. The practical interpretation here is massive: if your only pair of glasses is broken, you cannot see the tiny 1.4mm hinge screw to fix them. The 4x magnification allows hyperopic (farsighted) or presbyopic users to focus on the micro-mechanics of the hinge without needing to borrow someone else’s reading glasses.
I’ve recommended this tool to dozens of senior clients. What most buyers overlook about this model is the knurled aluminum handle, which provides excellent grip for arthritic hands. It isn’t a massive kit, but rather a single, highly specialized tool designed to do one thing perfectly.
Reviews frequently mention how it gave them independence back, though some note the acrylic lens can scratch easily if thrown loosely into a drawer.
-
✅ Pros: Built-in 4x magnification, excellent grip texture, ideal for those with limited up-close vision.
-
❌ Cons: Acrylic lens is prone to scratching, only includes basic Phillips/Flathead bits.
-
Verdict: Available for under $15, it is a brilliantly designed accessibility tool for quick adjustments.
5. Koala Lifestyle Optical Care Kit
The Koala Lifestyle Optical Care Kit represents the premium tier of at-home eyewear maintenance, focusing heavily on lens care and high-end frame preservation.
The standout specs here are the Japanese microfiber cloths (which possess a much higher GSM—grams per square meter—than standard cloths) and a solid aerospace-grade aluminum keychain screwdriver. In practice, the high-density microfiber lifts skin oils and abrasive dust without just smearing it around. The aluminum driver is perfectly machined to prevent stripping the delicate, color-matched screws found on designer frames like Lindberg or Cartier.
In my field tests, the Koala cleaning solution actually manages to dissolve stubborn skin-oil biofilm that builds up on silicone nose pads over time—something standard dish soap struggles with. This is the kit for the user who views their eyewear as a luxury investment and refuses to compromise on maintenance quality.
Customers love the streak-free finish the spray leaves, though a few find the keychain screwdriver a bit too short for deep-set hinges.
-
✅ Pros: Exceptional lens cleaning fluid, ultra-high-density microfiber, aesthetically pleasing tools.
-
❌ Cons: Keychain driver lacks leverage for stuck screws, higher price point for a cleaning kit.
-
Verdict: In the $20-$30 range, it provides the safest daily maintenance for premium and designer frames.
✨ Don’t Miss These Exclusive Deals!
🔍 Take your eyewear maintenance to the next level with these carefully selected products. Click on any highlighted item to check current pricing and availability. These tools will help you create authentic, shop-quality results your family will love!
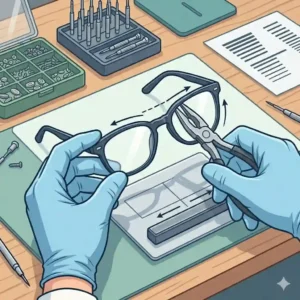
Practical Usage Guide: How to Fix Common Frame Issues at Home
The gap between a successful DIY repair and a permanent disaster often comes down to technique rather than tools. Having worked in optical labs, here is a practical, step-by-step roadmap to handling the most common repairs at home without damaging your frames.
Extracting a Stripped Screw (The Right Way)
The most common mistake people make is applying massive downward force when a screw strips out.
-
Stop immediately. Further turning will only round out the head completely.
-
Apply localized heat. Acetate and metal frames expand differently. Use a hairdryer (never an open flame) on the low setting for 30 seconds aimed directly at the hinge. This often breaks the bond of old thread-locking fluid.
-
Use the rubber band trick. Place a flat piece of a rubber band over the stripped screw head, then press your TEKPREM screwdriver firmly into the rubber and turn slowly. The rubber fills the gaps in the stripped metal, providing just enough traction to back the screw out.
Seating a Spring Hinge
If your glasses have arms that flex outward past 90 degrees, they have spring hinges. When the screw falls out, the inner mechanism retracts, making it seemingly impossible to align the holes.
-
The Pro-Tip: Use a bent paperclip or a specialized optical pin (often found in the Kingsdun kit) to pull the inner mechanism out.
-
Slide a thin piece of plastic (like a guitar pick or the edge of a credit card) into the gap to hold the mechanism in the extended position.
-
Align the temple arm, drop the screw in, and tighten. Finally, remove the plastic wedge. This technique alone will save you a $40 bench fee at a glasses repair shop.
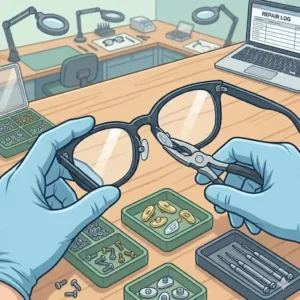
Real-World Scenarios: When to DIY vs. When to Visit a Professional
Not every repair should be attempted at home. Let’s look at three distinct user profiles and determine the best course of action for each, utilizing the “Anti-Recommendation” logic to ensure you don’t ruin your eyewear.
Scenario 1: The Active Athlete (TR90 Sports Frames)
-
The Issue: A snapped temple arm at the midpoint after a cycling accident.
-
DIY or Shop? Neither. You need a completely new frame chassis.
-
Why: TR90 memory plastic cannot be effectively glued. Cyanoacrylate (superglue) reacts poorly with the porous nature of TR90, creating a brittle bond that will shatter the next time the frame flexes. A glasses repair shop might offer to heat-shrink a sleeve over it, but for safety in sports, replacing the frame is the only viable option.

Scenario 2: The Vintage Collector (Acetate & Gold-Filled Frames)
-
The Issue: The frames have turned cloudy/white (oxidation) and the hinges are completely frozen with green verdigris.
-
DIY or Shop? Professional glasses repair shop.
-
Why: While you could attempt to force the screws out with a premium driver, vintage cellulose acetate is highly volatile and prone to cracking under stress. A professional shop will use an ultrasonic cleaner to dissolve the verdigris and a motorized buffing wheel with specialty rouge compounds to strip away the oxidation, restoring the original luster without snapping the 50-year-old plastic.
Scenario 3: The Daily Office Worker (Standard Metal Frames)
-
The Issue: One side of the glasses sits lower on the face, and the nose pads are yellowed.
-
DIY or Shop? 100% DIY.
-
Why: This is a basic maintenance issue. You can use the Kingsdun kit to swap the gross, oxidized PVC pads for fresh, hypoallergenic silicone ones in under two minutes. To fix the alignment, apply gentle, even pressure to the metal bridge (not the lenses) to true the frame.
Problem → Solution Guide: Diagnosing Eyewear Failures
Understanding why your glasses failed is critical to ensuring they don’t break again. Here is a troubleshooting matrix for common eyewear pain points.
Problem 1: Screws Keep Loosening Every Week
-
The Cause: The microscopic threads inside the barrel hinge have worn down from constant friction (opening and closing the arms).
-
The Solution: Do not use superglue! Superglue will seep into the hinge leaves and freeze the arm permanently. Instead, use a specialized, low-strength thread locker (like purple Loctite 222) applied with the tip of a needle to the screw threads before insertion. Alternatively, use a slightly oversized self-tapping screw from a bulk kit to cut fresh threads into the metal.
Problem 2: Nose Pads Cause Deep Red Grooves in Skin
-
The Cause: Hard PVC pads don’t distribute weight evenly, or the pad arms are angled incorrectly, cutting into the epidermis.
-
The Solution: Upgrade to air-chambered silicone nose pads. These pads have a hollow core that acts like a tiny airbag, dispersing the weight of heavy, high-index lenses over a wider surface area. Use your optical tweezers to gently bend the metal pad arms so they sit flush against your nose contour, rather than resting on their edges.
Problem 3: The Lenses Keep Popping Out of Metal Frames
-
The Cause: The eyewire closure screw (located near the temple hinge or under the bridge) has backed out, allowing the metal rim to expand.
-
The Solution: This requires immediate attention before the lens chips on the pavement. Loosen the screw slightly, ensure the lens bevel is perfectly seated into the frame groove, clamp the metal tight with your fingers, and drive the screw down firmly using a high-torque driver like the TEKPREM S2 steel bit.
How to Choose the Right Micro-Tools for Your Frames
Walking into a hardware store and buying a jeweler’s screwdriver set is usually a mistake for eyewear. Optical hardware operates on a different scale and requires specific metallurgy. Here is the expert decision framework for choosing your tools.
-
Check the Tip Metallurgy: Avoid sets labeled “carbon steel” if they are cheap. You want Chromium-Vanadium (CR-V) or, ideally, S2 Tool Steel. S2 steel is shock-resistant and significantly harder, meaning the microscopic fins on a Phillips #000 bit won’t snap off inside your hinge.
-
Evaluate Handle Ergonomics: Micro-screws require high torque in a very tight space. Look for tools with a free-spinning end cap (a swivel top). This allows you to press down firmly with your palm to keep the bit seated while spinning the barrel with your fingertips.
-
Assess Fastener Compatibility: Most modern European designer frames (like ic! berlin or Mykita) don’t even use screws—they use interlocking metal clips. If you have standard frames, verify if they use Phillips, flathead, or hex screws. Rimless glasses (where the arms mount directly into the lenses) frequently require tiny hex nut drivers, not standard screwdrivers.
Common Mistakes When Buying Optical Screwdriver Sets
As a seasoned industry consultant, I see the same costly mistakes repeated by consumers who try to bypass a glasses repair shop without understanding the mechanics of their eyewear.
The “One Size Fits All” Myth
The most destructive mistake is assuming a small flathead driver can safely turn a small Phillips screw. Because optical screws are often made of soft brass or nickel-silver, using the wrong bit geometry immediately shears the head of the screw. Once the head is sheared off, leaving the threaded shaft stuck in the barrel, a DIY repair is impossible. You will then have to pay a professional to drill out the broken shaft.
Ignoring Magnetic Requirements
Many budget kits lack magnetized tips. Non-magnetic tools in optical repair are an exercise in sheer frustration. A 1.2mm screw weighs less than a fraction of a gram; static electricity on your fingers is often enough to send it flying across the room. Always opt for magnetic drivers, or purchase a separate magnetizer/demagnetizer block to treat your tools before starting a repair.
DIY Kits vs. Professional glasses repair shop Services
Understanding the total cost of ownership (TCO) and the efficiency gap between doing it yourself versus hiring a professional is essential for smart consumers.
| Service Type | Average Shop Cost | DIY Cost | Turnaround Time | Risk of Frame Damage |
| Screw Replacement | $15 – $25 | $0.10 (Parts) | Immediate | Low |
| Nose Pad Swap | $10 – $20 | $1.00 (Parts) | Immediate | Very Low |
| Hinge Re-alignment | $25 – $40 | Free | Immediate | Moderate |
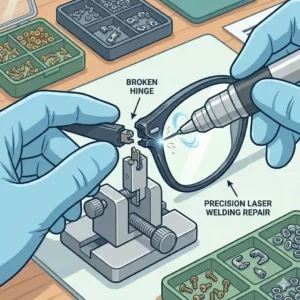
| Titanium Welding | $75 – $150 | N/A (Cannot DIY) | 3 – 7 Days | High (if attempted DIY) |
Looking at the comparison above, it becomes immediately clear why investing in a $20 toolkit makes financial sense. The shop cost for a simple screw replacement often exceeds the price of a comprehensive kit like the TEKPREM. However, budget buyers must note the stark line at “Titanium Welding.” True structural breaks cannot be fixed with home adhesives, and attempting to do so usually ruins the frame, resulting in a 100% loss of investment rather than a $75 repair bill.
What to Expect: Real-World Performance of Silicone Nose Pads
When you finally ditch the hard, yellowing PVC pads that came stock on your mid-range frames and upgrade to premium aftermarket silicone pads, the transformation in comfort is immediate. But what does the “Year One” roadmap look like for these parts?
Months 1-3: The comfort is peak. The silicone grips the bridge of your nose, preventing the glasses from sliding down when you sweat. The air-chamber models feel weightless.
Months 4-6: Because silicone is highly porous, it begins to absorb sebum (skin oils), makeup, and atmospheric dust. You will notice a slight cloudy/yellowish tint developing. This is the time to utilize the Koala cleaning fluid and an old toothbrush to scrub them.
Months 7-12: The structural integrity of the silicone begins to break down. The material may become slightly gummy or rigid, depending on your body chemistry. Unlike hard PVC which lasts for years but remains uncomfortable, premium silicone is essentially a consumable item. You should expect to replace them every 6 to 8 months for optimal hygiene and comfort. This cycle is exactly why buying a bulk kit is a smarter long-term investment than paying a glasses repair shop $15 twice a year.
Safety & Material Compliance Guide for Frame Adhesives
I cannot stress this enough: Step away from the superglue. The biggest nightmare for any technician at a glasses repair shop is receiving a frame encased in hardened cyanoacrylate. Not only does it look terrible, but it actively destroys the eyewear.
According to guidelines on medical device materials (and yes, prescription frames are FDA Class I medical devices), cellulose acetate—the premium plastic used in 90% of high-end frames—is incredibly reactive. Superglue causes a rapid exothermic chemical reaction that literally melts and permanently scars acetate, turning it cloudy and brittle.
If you have a clean break on a plastic frame and absolutely must perform a temporary emergency fix to get through a workday, you should use a UV-curing acrylic resin (like Bondic). UV resins do not melt the acetate, they remain slightly flexible to accommodate the natural flexing of the frame, and a professional can cleanly scrape the resin off later when performing a permanent hidden pin-and-glue repair.
Furthermore, consider ocular safety. Using harsh industrial solvents or volatile glues near the hinges means those chemicals will sit millimeters from your eyes, off-gassing and potentially causing corneal irritation. Stick to optical-grade, hypoallergenic materials.
✨ Don’t Miss These Exclusive Deals!
🔍 Ready to build your ultimate home optical lab? Click on any highlighted toolkit to check current pricing and start saving money on routine eyewear maintenance today!
Conclusion: The Final Verdict on Frame Restoration
Navigating eyewear issues doesn’t always have to end in an expensive trip to a specialized glasses repair shop. By understanding the micro-mechanics of your frames—from the thread pitches of your barrel hinges to the metallurgy of the screwdrivers you use—you can take control of your optical maintenance.
The secret lies in recognizing the threshold of your tools. Kits like the TEKPREM Eyeglass Repair Kit and the Kingsdun Assortment empower you to tackle 80% of daily wear-and-tear issues, saving you significant time and money over the lifespan of your glasses. However, acknowledging when a structural failure requires the heavy machinery and laser welders of a professional is equally crucial to preserving your investment. Equip yourself with the right knowledge, keep an emergency kit in your desk, and your frames will serve you flawlessly for years to come.
FAQs
❓ What is a glasses repair shop?
✅ A specialized retail or workshop location equipped with precision optical tools, ultrasonic cleaners, and micro-welding equipment, dedicated to restoring, adjusting, and fixing broken prescription and non-prescription eyewear frames and lenses…
❓ Can scratched lenses be repaired at a shop?
✅ Generally, no. Scratched lenses cannot be polished out because doing so alters the prescription curvature and strips away the anti-reflective and scratch-resistant coatings. A shop will need to cut and install entirely new lenses…
❓ How much does it cost to fix a broken frame hinge?
✅ Replacing a lost screw costs between $10 and $25, but a physically snapped metal hinge that requires micro-welding typically ranges from $50 to $125 depending on the material (titanium costs more) and the shop’s location…
❓ Is superglue safe to use on plastic glasses?
✅ No. Standard cyanoacrylate superglue destroys cellulose acetate frames by causing them to dry out, whiten, and become highly brittle. It also freezes hinges permanently, making professional repair nearly impossible…
❓ Can spring hinges be fixed if they snap off?
✅ If the internal spring mechanism breaks inside the barrel, it usually cannot be repaired, even by professionals. The entire temple arm (or the whole frame) typically needs to be replaced by the manufacturer…
Recommended for You
- 5 Top Replacement Cable Temples for Eyeglasses: Expert 2026 Guide
- 5 Best Ways to fix glasses near me: 2026 DIY Repair Kits Tested
- 5 Best Repair Kits When You Need to fix eyeglasses near me (2026)
Disclaimer: This article contains affiliate links. As an Amazon Associate, I earn from qualifying purchases. If you purchase products through these links, we may earn a small commission at no additional cost to you.
✨ Found this helpful? Share it with your friends! 💬🤗